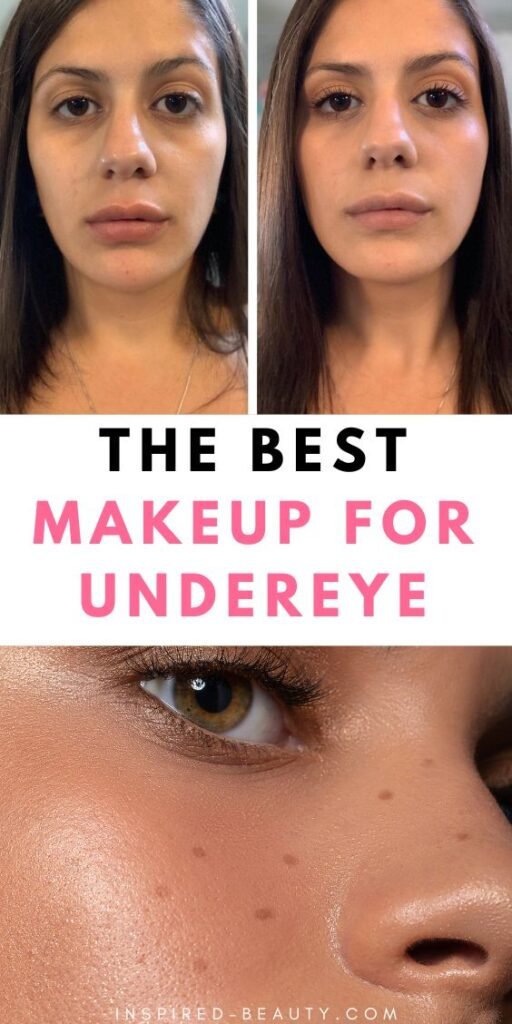
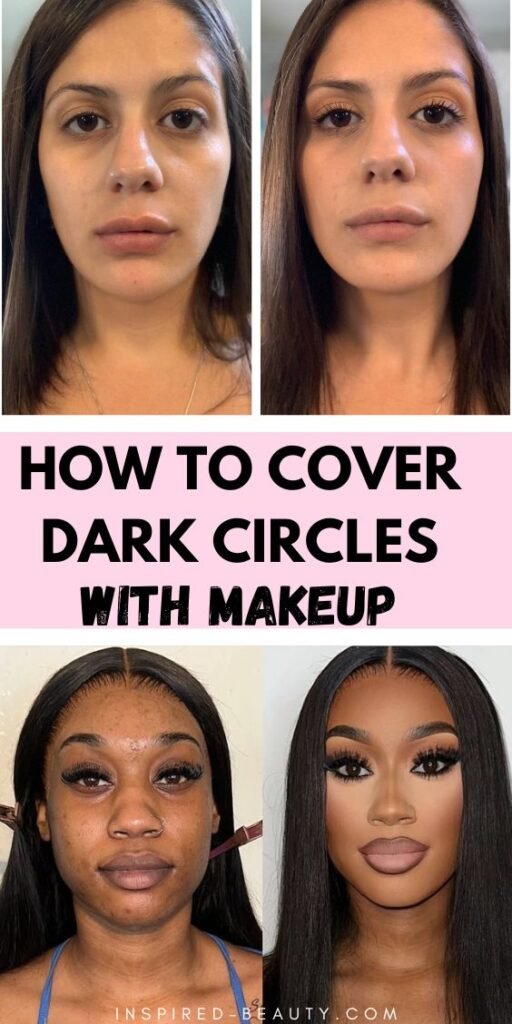
Dark Circles Makeup That Really Helps
Tired of looking… tired? You’re not alone. Undereye circles are one of the most common beauty concerns for women of all ages, and covering them up the right way can be a total game-changer.
Whether yours are caused by genetics, lack of sleep, or that third espresso you probably didn’t need (guilty!), this guide will show you how to brighten up your under-eyes with minimal effort and maximum glow.
How To Conceal Dark Circles
Step 1: Pre-Makeup Prep Is Everything
Prepping your skin is important before you start with concealer, as it can make all the difference to your final look.
Use a hydrating eye cream with ingredients such as caffeine, hyaluronic acid, or peptides.
Pro tip: Chilling your eye cream in the fridge or apply a cooling gel patch to help reduce puff instantly.
Let the product sit for 5–10 minutes so your skin is smooth and ready for makeup.
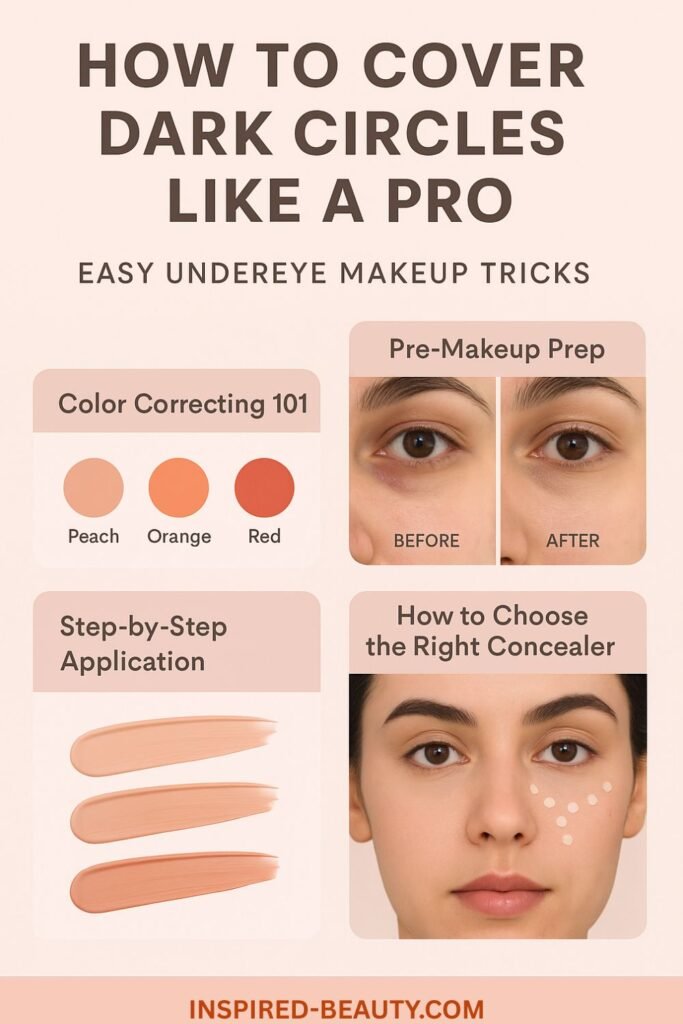
Step 2: Color Correcting 101
This is the secret sauce most people skip—but it makes a HUGE difference.
- Light skin tones: Use a peach or salmon corrector
- Medium skin tones: Try orange corrector
- Deep skin tones: Go for a rich red-orange tone
Apply a small amount to the darkest part of your skin, which is usually near the inner corner, then blend gently with your fingertips or a damp sponge.
Correct before you conceal—it neutralizes the blue/purple tones completely.
Step 3: Pick the Right Concealer for Dark Circles
The wrong concealer can make your dark circles look even worse.
Here’s what to look for:
Skin Type Best Formula
Dry/Mature Hydrating, radiant finish
Oily/Combo Creamy but long-wear, not too matte
All Skin Types Lightweight, buildable coverage
Tip: Go just one shade lighter than your foundation to brighten without looking ghostly.
Some of my favorites, and yeah everybody’s, include Nars Radiant Creamy, Maybelline Instant Age Rewind, and Kosas Revealer.
Step 4: Application That Actually Works
Here’s how to apply concealer the right way yes, there’s a wrong way!
Dot concealer under the eyes in a semi-triangle or only on the dark areas.
Let it sit for 30 seconds before blending. This gives you fuller coverage.
Blend with a sponge or fingertip, tap, never rub.
Optional: Add a second light layer only if needed.
Less is more you want coverage, not cake.
Step 5: Set It Without Drying Out or Creasing
You worked hard to cover those circles—don’t let creases ruin it.
Use a light dusting of loose translucent powder
Apply with a fluffy brush, not a sponge
For dry or mature skin: skip powder and try a hydrating setting spray instead. Don’t bake your under-eyes unless you’re under studio lights—it can age the area fast.
Common Mistakes to Avoid
- Using the wrong shade of light or the wrong undertone
- Skipping prep (hello, dry patches)
- Applying too much product (leads to creasing)
- Rubbing instead of tapping while blending
Our Go-To Undereye Heroes
These products have been tested and loved by beauty lovers everywhere:
| Category | Recommended Products |
|---|---|
| Color Corrector | LA Girl HD Pro, Bobbi Brown Corrector |
| Drugstore Concealer | Maybelline Instant Age Rewind |
| High-End Concealer | Nars Radiant Creamy, Tarte Shape Tape |
| For Mature Skin | Kosas Revealer, IT Cosmetics Bye Bye Undereye |
| Setting Powder | Laura Mercier Translucent, Huda Beauty Easy Bake |